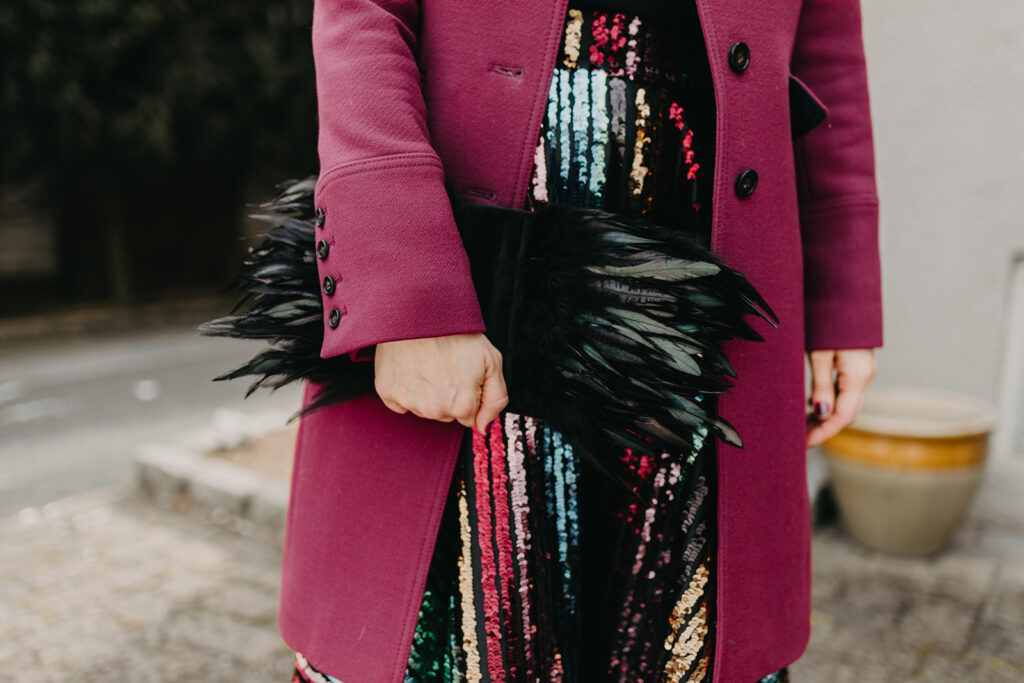
I have wanted to make a make a bag like this for a long time; however, feathers can be a tricky embellishment to work with. I have found there is fine line between looking stylish and looking like an exotic dancer. So, for my first time out of the gate I went with the idea that “less is more”. At some point, I’d like to use them on clothing, but today we are going to keep it simple. I’m going to show you how to make a DYI Fold Over Feather Clutch.
In my sequin skirt post, I mentioned that I’m going to a fancy dinner next week. I’ll tell you more about it later, however it’s something I definitely wanted and an outfit (bag included) that was fancy and fun.
Sewing with Feathers
I saw this bag on pinterest and wanted to create something similar. One thing to take into consideration when sewing with feathers is that they can be expensive. The feathers in this photo are called biots. As you can see here, they usually come sewn onto a ribbon or trim, so they are easier to sew. They are also very sparse. A lot of times sellers will fold the feathers to make it look like you are getting more than you really are so buyer beware! I learned hard way. They are usually sold by the yard and can be upwards of $10-$12/yard. Obviously, that means you need a lot of feathers to achieve the look of this bag.
I wasn’t ready to spend a fortune on feathers just to make a bag so I started looking at other options. I ended up with rooster coque feathers, and purchased some very similar to these. You can see mine look more black, but they have that iridescent sheen to them. The bag turned out great!
I recommend using rooster coque feathers or some other soft feather. It makes it easier when you need to turn your bag inside out as you’ll see in the instructions. The biots are stiffer and might break if you bend them too much.
DYI Fold Over Feather Clutch – Materials
1/2 yard outer fabric and 1/2 yard lining fabric – I used black velvet for my outer fabric, but any sturdy woven fabric will work.
1/2 yard lightweight interfacing and 1/2 yard medium weight interfacing
20ft rooster coque feathers

DYI Fold Over Feather Clutch – Instructions
Cut all fabric and interfacing 7″ x 13″. You will use a 1/2″ seam allowance unless otherwise noted. When finished the bag will measure 6″ x 12″ when open and 6″ x 6″ when folded.
Following the instructions fuse the medium weight interfacing to the wrong side of your outer fabric and fuse the lightweight interfacing to the wrong side of you lining.
Next cut a piece of out fabric 3″ x 13″. This piece of fabric will run down the center of the bag covering up the trim on the first row of feathers.

Sewing the Feathers
*Before we get started there are two things to keep in mind. First, most feathers are dyed, so your fingers will get stained while handling them. Not to worry it washed off. Second, the feathers are glued to the ribbon trim, so when you pin it to your fabric your needles will get gummy. Be prepared to toss them out when your done. You don’t want them ruining your next project.
Cut your feathers in 13″ strips. The number of strips you use will depend on how many feathers you want on your bag. I used 6 strips. Three on either side of the center of the bag.
Now you need to decide if you want your feathers to hang over the edge of the bag like mine. Mine hang over about an inch and half. Keep in mind if you do choose to have them extend past the edge of the bag it will it make trickier to sew the bag together but it is definitely doable.
Start laying strips of feathers on top of the bag to get an idea of where you will pin them. I used three strips on either side of the center trim. It comes out to roughly 1.5-2 inches between each strip. I also placed the two strips closest to the center right next to each other.
Start pining the feathers to one of the outer pieces of fabric. It doesn’t matter which one.

Starting from the outer edge pin the first strip to the bag and sew down along the trim. Do this on both sides of the bag.

Repeat for the second row,

And the third row.

Next take your 3 inch strip of fabric and fold the long sides under 1/2″ and press. Then lay it on top of your bag in the center and top stitch down either side.

With right sides together pin your outer bag pieces together and sew around all three sides.
*Now for the tricky part. If you decided to have your feathers extend over the edge of the bag you will need to gently slide them out of the way as you sew. Put your hand inside the bag and as you sew down gently pull the feathers towards you. It’s a little awkward but it will keep them from getting caught in the seam allowance. Don’t worry you won’t damage the feathers as they are slightly flexible.
Next sew your lining pieces together with right sides facing but remember to leave a 5″ opening in the bottom.
Place your lining over the outside of the outer part of your bag. Don’t worry about crushing the feathers.

Stitch around the top of the bag.

Flip the lining so it the right side is facing out.

*Optional – you can under stitch the lining so it will lay nice and flat when you turn into the bag.

Sew up the bottom of the lining and flip it into the bag.

Fold the bag over and you are set! Now you have your very own DYI Fold Over Feather Clutch!

*Side note I decided to change the color of the lining at the last minute from white to black so it would match the bag. I also opted to not put a closure on the bag. I won’t be putting a lot of things in it so I didn’t think it needed one.
As always thanks for reading. Hope your off to a great week!