
Annnnd we’re back! I know its been a while and here we are in the middle of July? How did that happen? Oof time is flying by as usual, especially now that summer is here. So let’s get to it. This summer is all about wearing easy clothing. I’m definitely ready to start wearing real cloths now that life is starting to resemble something close to normal, but I still want to be comfortable. So for me that means easy summer dresses with no zippers, and this DIY shirred dress is a perfect example.
DIY Shirred Dress Pattern
Shirred dresses are everywhere this summer. I mean seriously everywhere, and I am very okay with it. It’s a cute flattering style that looks great on everyone. But most importantly it’s comfortable with a capital C!
I found this great Indi pattern on Etsy a few months ago. Now, the pattern call for a zipper, but keeping in line with my whole “no zipper clothing” mantra, I wanted to use shirring instead. I wrote a post last summer on how to shirr, you can read it here. It’s a simple technique that requires you to use elastic thread in your bobbin while stitching straight lines across your fabric.
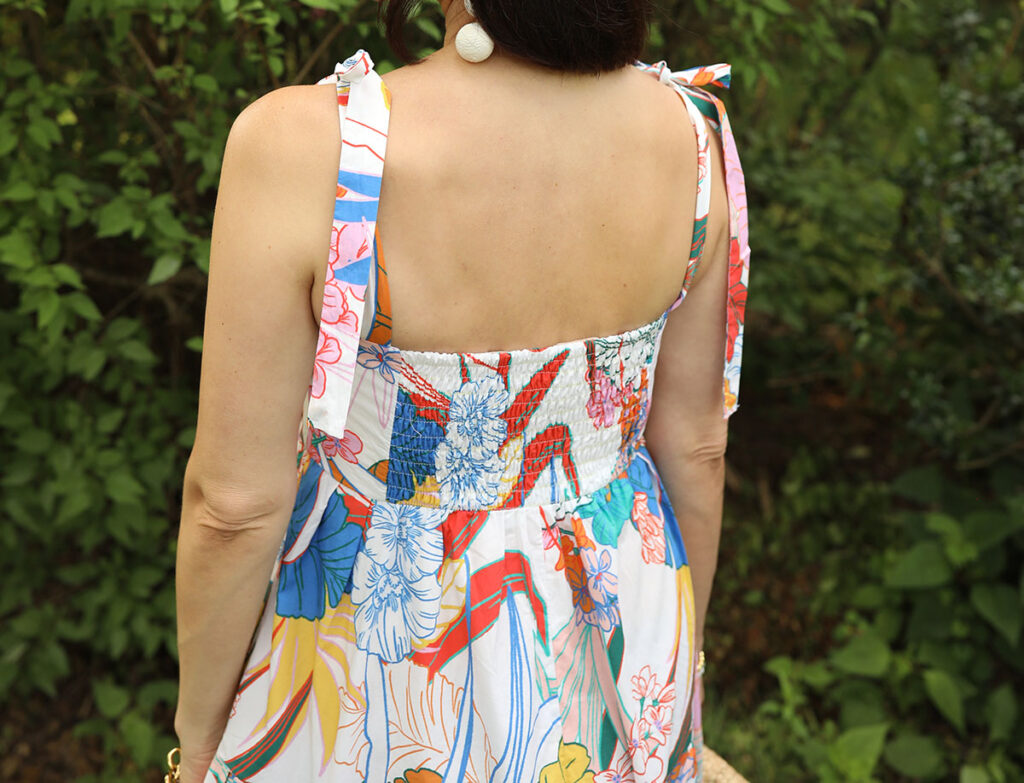
One other change I made to the pattern was using tie shoulder straps instead of regular shoulder straps. Just between you and me ties shoulder straps are much easier to make than regular straps. The pattern straps were also wider than I wanted them to be so I reduced the width by an inch.
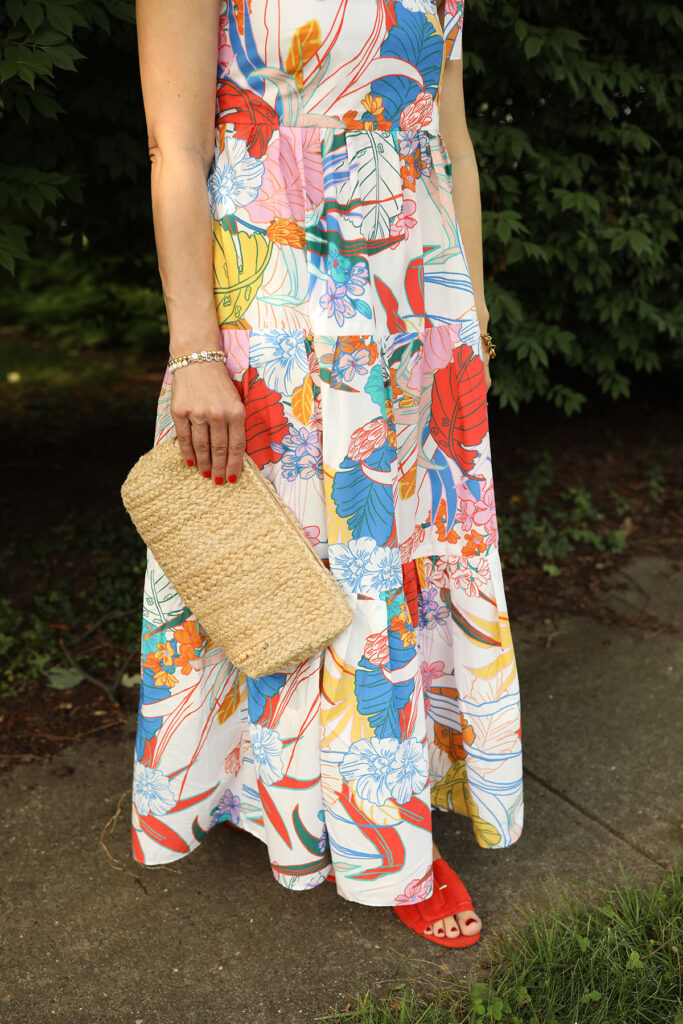
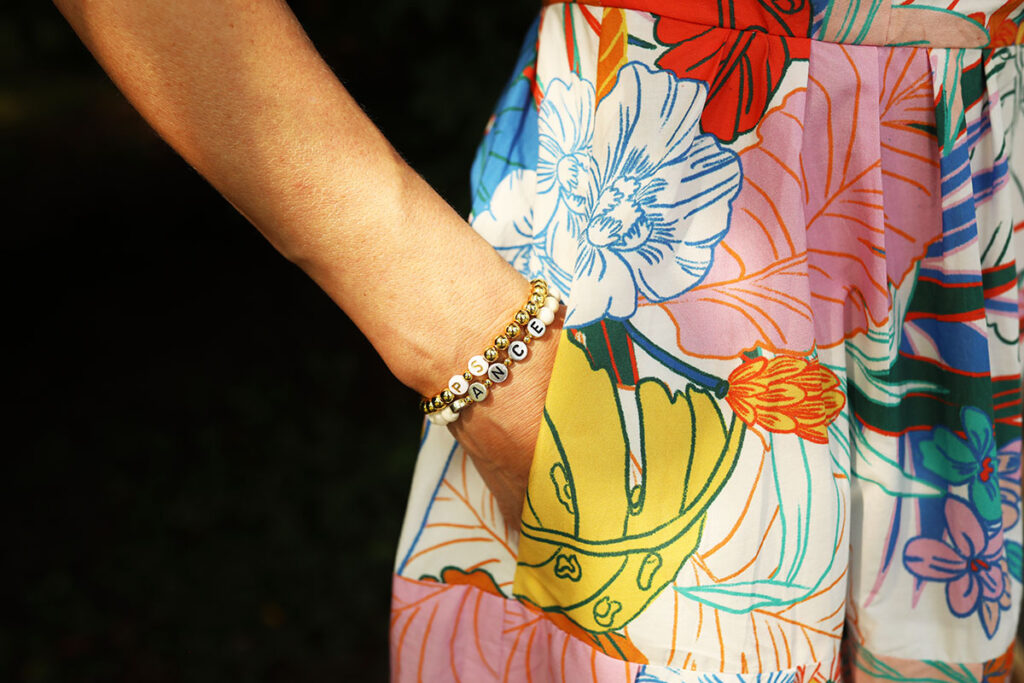
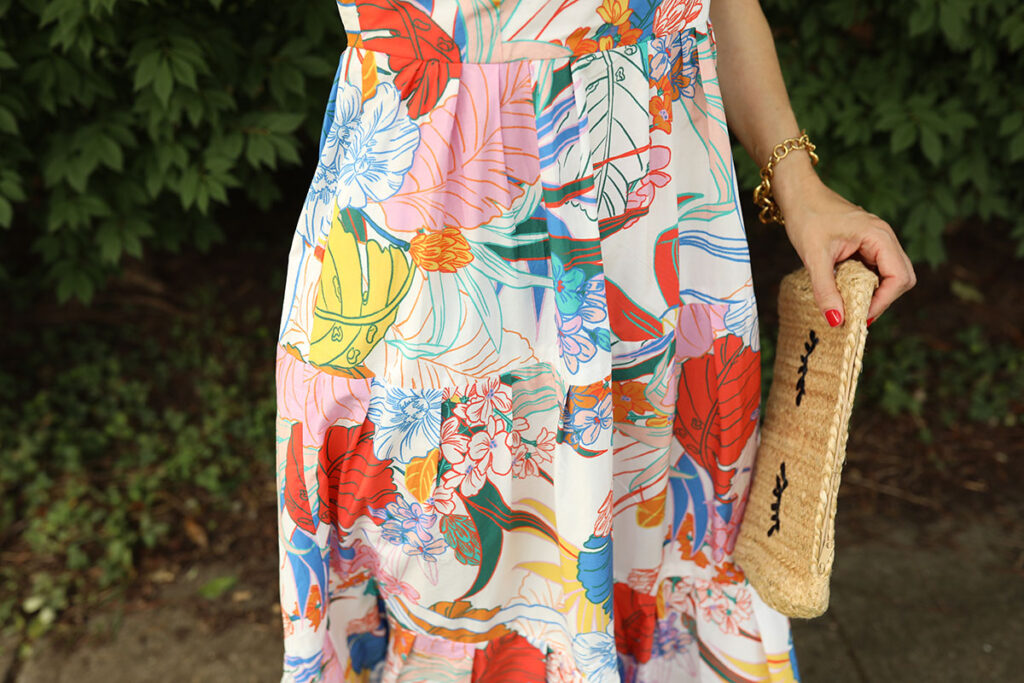
However, the best update I made to the pattern was to add pockets! I’m obsessed with putting pockets in everything. Pockets make a dress that much more fun to wear. I read a funny quote recently that said “what good is a dress if it doesn’t have pockets?” My thoughts exactly!
As a rule of thumb you should use a piece of fabric 2x the length of the original pattern piece. So if you are shirring an entire bodice you will measure around your body and multiply that by 2. Sometimes only the back of a dresses is shirred. In this case I chose to shirr just the middle of the back of this particular dress. So, I measured just the center back multiplied by 2, and then sewed the rest of the dress per the instructions.
DIY Shirred Dress Fabric
I purchased this cotton fabric from Mood last winter and they still have it in stock. It’s only $15/yard and I am tempted to buy more. It’s a very fun print and think it would make a cute pair of shorts.

Styling
This dress really speaks for itself so I kept the everything else natural. Orange flat slides and a straw bag did the trick. A simple gold bracelet and my favorite Bon Bon earrings finished the look. I will say it’s very comfortable and super easy to just throw on. After this last year I think keeping things simple is a must, especially when it comes to getting dressed!
Thanks for reading. Hope you are having a great day!
Photos – Chloejane Photo + Film